Clients struggling to share access to their
Google Analytics
accounts? Get the access you need in minutes with a free trial of Leadsie.
14 day unlimited free trial
Extend until you onboard a client
No credit card required
Keep access to clients if you cancel

With easy one-link access requests for 13+ platforms your campaigns can go live in minutes, not days. Start free today.
Approved by Meta, Google & Tiktok
Keep access to clients' accounts if you cancel
Secure & 100% GDPR compliant


Google Analytics may seem complex with all the insights and data it collects 24/7 from your website (or mobile app), but it is free and easy to get started with (we'll show you how). Even if you don't utilize all the treasure trove of marketing analytics it provides now, you might eventually work with an agency, consultant, or marketing freelancer that does.
Google Analytics (also called Google Analytics 4 or GA4) is a free website and app analytics platform by Google that helps you track how people find and use your website or app.
It tracks important data such as:
It also integrates seamlessly with other Google tools like Google Ads and Search Console, making it easier to understand where your traffic comes from and which marketing efforts drive results.
GA4 is for anyone with a website or app who wants to make data-driven decisions. You don't need to be a developer to get started since many website platforms like WordPress, Wix, and Squarespace let you install GA4 without touching code.
Note: Google also offers a paid enterprise version called Google Analytics 360, which includes higher data limits, advanced support, and additional features for large organizations.
Before getting started, you’ll need:
✔️ A Google account (Gmail or Google Workspace)
✔️ A website or app you want to track
✔️ Admin access to your website if you plan to install GA4 yourself
It’s also helpful to understand the difference between a Google Analytics account and a property:
Most businesses only need one account and one property to get started.
To create a Google Analytics account, go to Google Analytics, sign in with your Google account, name your account, create your first GA4 property, choose your business details, and click “Create.”
Here’s the step-by-step process:
Visit Google Analytics (https://analytics.google.com/) and click the blue “Start measuring” button.
You may be asked to:
❗ Note: If you already use Google Analytics and want to create a separate account for another business or website, click Admin > Create > Account.
This is useful if you manage multiple businesses or want to keep reporting separate.
Enter an account name, which is usually your business, brand, or website name.

You’ll also see the account data sharing settings, where you can choose what information is shared with Google for things like:

💡Tip: Keep the default settings enabled unless you have specific privacy or data-sharing preferences.
Click “Next.”
Now create your first GA4 property. A property is the specific website or app you want to track inside your account.
Enter your:

💡 Tip: Choose your timezone carefully. Changing it more than once a day can affect reporting consistency and create temporary spikes or gaps in your analytics data.
Next, select your industry category, business size, and business objectives. Google uses this information to personalize your default reports and recommendations inside GA4.
For example, choosing “Generate leads” customizes reports around lead tracking and conversions.
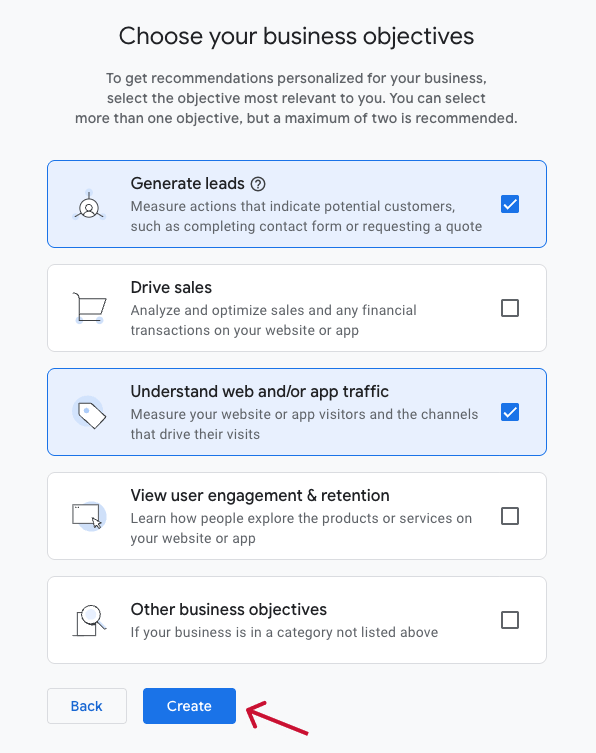
Click “Create” and accept Google Analytics’ Terms of Service to finish setup.
Once you see the Start collecting data screen, your Google Analytics account and first GA4 property have officially been created. 🙌
.png)
❗ Important: Tracking has not been installed on your website or app yet.
You can now continue setting up tracking for your platform or click “Skip for now” to access your Google Analytics dashboard.
The next section covers how to install Google Analytics on your website or app.
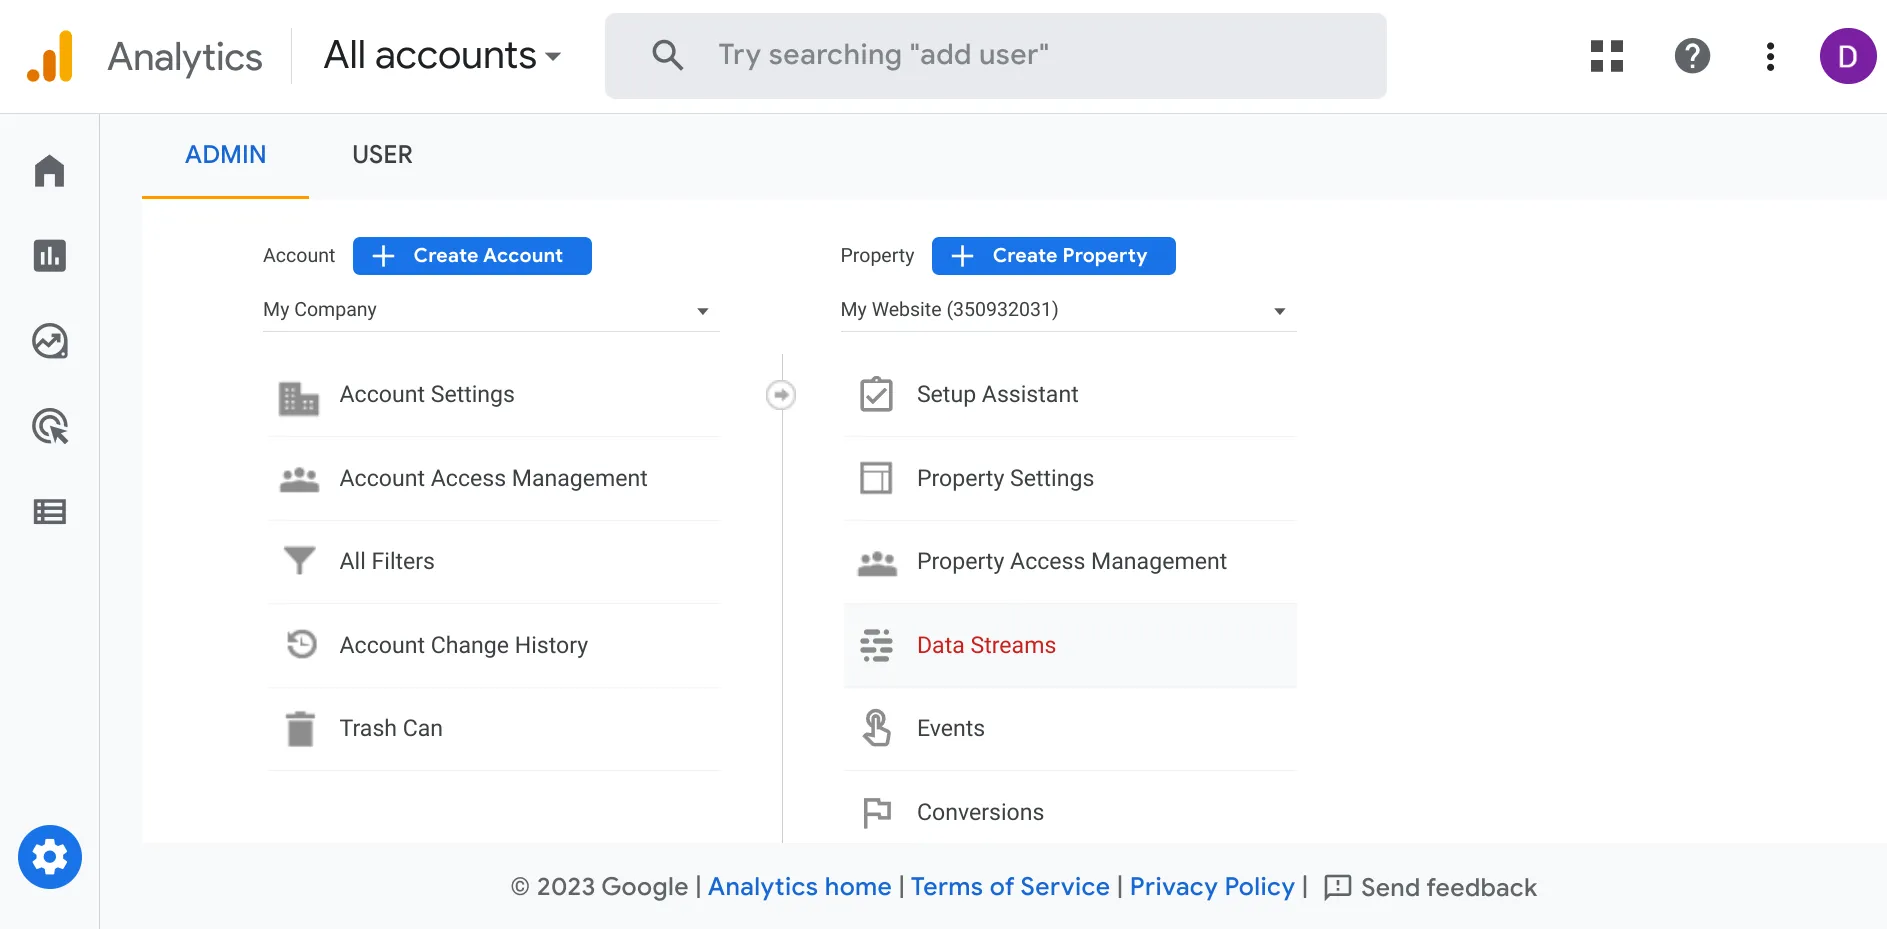
A data stream is the connection between your website or app and Google Analytics. It sends user activity data into your GA4 property.
To get started, click “Web” since we’re setting up tracking for a website.
If you skipped this step earlier, you can manually create a data stream anytime by going to:
Admin > Data Streams > Add stream.
Next, enter your website URL and a stream name (usually your website or business name)
You’ll also see the option to enable Enhanced Measurement, which automatically tracks actions like:
Once you’re ready, click “Create stream.”
You can choose to set up a data stream for your website or an app.

Google Analytics will generate a Measurement ID (also known as Google Tag). This unique ID starts with “G-” followed by a combination of letters and numbers, such as: G-PSW1MY7HB4
Your Measurement ID connects your website to your GA4 property and ensures your website data is sent to the correct Analytics account.
You’ll use this ID in the next step when installing Google Analytics on your website.

To start collecting data in Google Analytics, you’ll need to install your Google tag on your website.
You can do this in three ways:
Many website platforms already include built-in Google Analytics integrations, including:
List of platforms that accept google tag id: https://support.google.com/analytics/answer/10447272?hl=en
In most cases, all you need is your Measurement ID, which starts with “G-”. To find it, simply go to Admin > Data Streams.
If you use WordPress, one of the easiest ways to install Google Analytics is with Site Kit by Google (Google’s official WordPress plugin).
To set it up:
Once connected, Site Kit automatically installs your Google tag and starts sending data to Google Analytics.
Site Kit can also connect your WordPress site with other Google products such as Google Search Console.
💡 Tip: Installing Google Analytics through WordPress is usually the easiest option for beginners because it avoids manually editing your website’s code.
If your platform doesn’t support a direct GA4 integration, you can manually add the Google tag to your website.
To do this:
Google will generate a JavaScript snippet for your website.
Copy the entire Google tag and paste it immediately after the <head> tag on every page of your website.
If a developer manages your website, send them the tracking code to implement instead.
Google Tag Manager (GTM) lets you manage tracking tags without editing your website’s code directly.
Before getting started, you’ll need a Google Tag Manager account and a container, which is basically a workspace for your website’s tracking tags. Creating one is simple; you’ll just enter your business name and website URL during setup.
To install GA4 using GTM:
Many marketers and growing businesses prefer Google Tag Manager because it makes it easy to:
💡If you’re new to analytics setup, installing GA4 through your CMS or website builder is usually simpler than using Google Tag Manager.
After installation, it can take up to 30 minutes for data to appear in Google Analytics.
To verify your setup:
You can also use DebugView or Google Tag Assistant for more advanced troubleshooting.
Need to clean up an old setup or remove tracking from a website? Google Analytics lets you delete accounts, properties, and data streams from the Admin settings.
To delete them:
💡 Be careful before deleting anything. Removing a data stream permanently stops data collection, and deleted streams cannot currently be recovered.
You’ll also need Editor permissions or higher to make these changes.
Once your Google Analytics account is live, there are a few important things you should set up next to get more useful data and insights from GA4.
If you work with teammates, freelancers, or marketing agencies, you’ll need to grant them access to your GA4 account so they can view reports, manage tracking, or help optimize your website’s performance.
In GA4, you can add users at:
To add users:
For a full walkthrough, check out our guide on how to give or request access to Google Analytics.
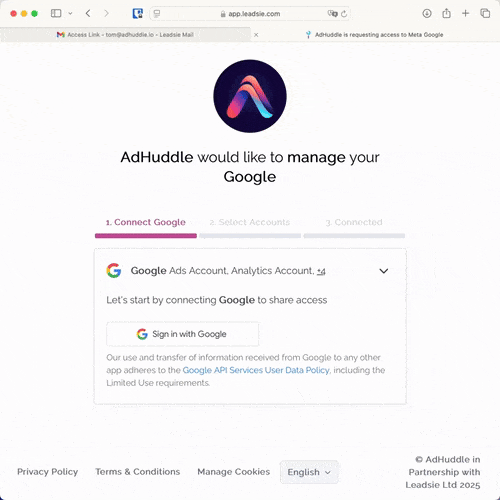
💡 If you work with a marketing agency, they can send you a Leadsie request link instead. This lets you securely grant access to Google Analytics without manually adding users or changing permissions yourself.
If you run Google Ads campaigns, linking them to Google Analytics helps you understand which ads, keywords, and landing pages drive the most valuable traffic and conversions.
To connect the two:
Once connected, Google Ads and GA4 can share conversion and audience data, helping you improve campaign targeting and reporting.
GA4 uses event-based tracking, meaning actions on your website, like form submissions, purchases, scrolls, and outbound clicks, can all be measured as events.
Some actions are automatically tracked through enhanced measurement, a GA4 feature that tracks common interactions like scrolls, page views, and file downloads without needing extra code.
You can also mark important events as conversions to track goals like purchases, lead form submissions, or sign-ups.
Working with marketing partners or agencies? There’s an easier, faster, and more secure way to share access to your business accounts.
With Leadsie, you can grant access to all your marketing accounts in just a few clicks.
Leadsie is a client onboarding software that simplifies requesting and giving access to marketing assets, social media, and ad accounts with one secure link. Give access to your Facebook, Instagram, Google, TikTok, Shopify, LinkedIn, and 20+ other accounts without sharing passwords.
Leadsie speeds up client onboarding by replacing manual access requests with one secure approval link. Your agency partner sends it to you, you approve the permissions you want to give, and they get instant access.
✅ Approve the exact access your partners need
✅ Keep all your permissions secure and easy to manage
✅ Reduce onboarding time by more than 50%
✅ Avoid costly mistakes like giving the wrong level of access
✅ Get projects started faster
🎁 If your agency isn’t using Leadsie yet, share this with them—they can try it free for 14 days (no credit card needed)!
P.S. It's risk-free and you get to keep the account connections after the trial ends 🙌

Dov is a freelance writer who prides himself on offering insightful content that will engage your audience and solve their problems. In his free time, he's often found wandering through the Himalayas, sometimes with a hiking pole, but almost definitely with a book.


Clients struggling to share access to their
Google Analytics
accounts? Get the access you need in minutes with a free trial of Leadsie.
Approved by Meta, Google & Tiktok
Keep access to accounts if you cancel
Secure & 100% GDPR compliant
Delete your onboarding PDF. Cancel the video call. Just send one link, and get hassle-free access to 13+ platforms in minutes. Start free today.
Approved by Meta, Google & Tiktok
Keep access to clients' accounts if you cancel
Secure & 100% GDPR compliant
It is a unique data container for data from web or apps. Each GA4 account can have multiple properties.
Yes, you can change it under Property settings > Property details. However the changes only apply to future data, not retroactively.
Questions unanswered? Check out our help center or get in touch 🤠